Induction Tdoc Manual – Administrator
The induction app is a Tdoc’s independent module that communicates with it. In this module, they can be configured induction trainings to send to contractors and, at the same time, they can send those trainings to their workers.
If workers are already registered in tdoc, certificates will be sent automatically there and they will appear as validated on the platform.
Access to induction’s application
To access the induction application go to access.tdoc.es and click in Log In. Log in with your username and password. If you do not have access, contact the administrator.
Use a web browser like Google Chrome, Mozilla Firefox or Microsoft Edge. Do not use Internet Explorer as it is no longer updated by Microsoft.
You will see a menu on the top bar that says “Induction.” When you move the mouse over this bar, it will appear the name of the client for which you are administrator and the options “Training” and “Send training”.
The other options allow you to change the language and log out.
Trainings
It will appear the list of training courses in progress. For each training, it is indicated the next data:
- ID: correlative number of the training
- Date: registration date of the training
- Sent to: list of email addresses to which a training has been sent
- Course: course sent
- Company: company to which the course has been sent
- Work Center: tdoc center to which the course applies
Moreover, it will appear the following icons:
- Share button: pressing this button, it copies the training link to the clipboard
- The See registered students button indicates the number of students registered in the training. Pressing it gives access to the list of students registered in the training and the status of their training (completed yes / no)
- Delete button: allows you to delete the training as long as there are no registered students yet
To send training
From here you can send a training to a company.
A training is given for one or more work centers and consists of one or more courses.
1- Select the Work Centers.
Select the work centers from the table. It can be filtered by any of the fields. The selected centers will appear on the right.
2- Select the Courses
Select the courses from the table. The courses appear in the table for 2 reasons:
- It is a general course, which applies to all centers (for example, a general training for wind power jobs)
- • It is a course for a center, and a center has been selected in which it applies (for example, a specific training for a center)
It can be filtered by any of the fields. The selected centers will appear on the right.
3- Decide if is a formation for company or generic
Decide if we need a formation for companies or a generic formation.
- Decideing the formation for companies, the company will have to be selected on the next point.
- Decideing the generic formation, it won’t be able to select the company on the next point. The company will be selected on the registration of the course by the student.
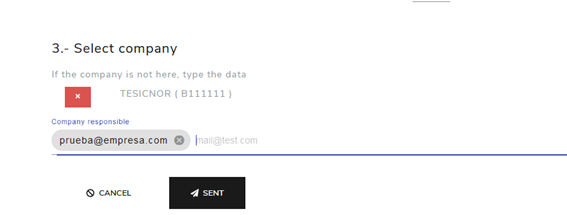
4- Select a company
Select the company to which the training will be sent. This option will only be possible if we have the option for companies selected
The search engine will automatically look at all the companies registered in tdoc. It is important to check that the company is registered in tdoc so that the certificates can be sent and validated automatically.
Search by name or VAT number and select.
The company data is automatically completed, disappearing fields from the form.
In addition, the email addresses of the managers of that contract will appear in tdoc. You can remove them and / or add more.
Press the Send button.
In case of having searched for the company and the company DOES NOT exist, fill in all the fields of the form: name, VAT number and persons in charge.
Press the Send button.
See registered students
From the See registered students button you can see the list of workers in that training. It appears the following data:
- ID: correlative id of the student
- tdoc: if it is linked to Tdoc it appears an icon and if not, it appears the word No. If it is linked, the certificate will be uploaded automatically to tdoc, if it does not, means that the worker has been created manually
- Student: worker’s name and surname
- Email: email with which the worker has registered
- Course: course in which the worker has registered. If the training includes more than one course, it appears on separate lines
- Completed: Yes / No depending on whether the training has been completed or not
- Share: link of the registered student, it can be copied from here to share it by email
- Download certificate: only if the worker has finished the training, you can download the certificate from here
Result page
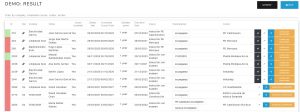
In result page we can find the information of a worker inside a curse. (The expiration date, center, course, company, if the course is completed, …).
The table will be filterable and sortable by the fields on the top.
We can find colors on the table showing us the proximity to expire:
- Red: expired
- Yellow: Almost expired
- Green: Not expired
At the end of the row, there will be one permanent button and three variable buttons.
- The first button is variable and dark color. It will appear when the tdoc is linked and when the course is finnished. This button will resend the certificate to tdoc.
- The second button, is permanent and white color, allow us to resend the course to the worker. This avoid having to send the link again and the worker having to sign up again. The worker will receive an email indicating that he needs to retake the course.
- The thirth button, is permanent and blue color, it will allow us to copy the link to the course.
- The fourth button, orange color and variable, will appear when the course is finnished. It will allow us to dowload the certificate.
The actions button on the right top part of the page will show two options.
- Export the table to excel taking the filters of table
- Filter the table between completed course and all courses.
Historic page
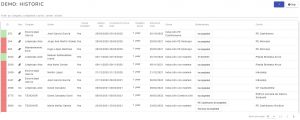
In history page we can find the information for all completed courses. The displayed data is the same as what is found on the results page.
From this screen, operations on the certificates or downloading of this data are not allowed.
The table will be filterable and sortable by the fields on the top.
We can find colors on the table showing us the proximity to expire:
- Red: expired
- Yellow: Almost expired
- Green: Not expired
The actions button on the right top part of the page will show one option.
- Export the table to excel taking the filters of table
Support
For support or technical issues, contact support.induccion[at]tdoc.es


