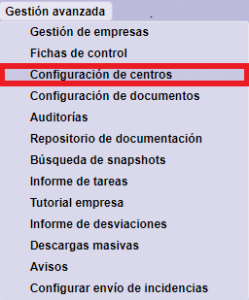
Centers Configuration
From this menu, you can access to the list of functional areas and configure each of them.
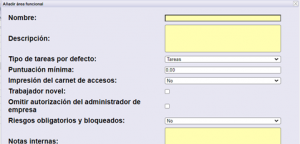
| Add functional area.
It appears a pop-up window to write down the information about the functional area/technology: – Name and description. – Type of task that affects by default: tasks / general tasks (by center). * Minimum score. Allows you to set a minimum score for tasks in the functional/technology area. * Printing the access card * Novel worker. It allows to limit the access for novel workers to the functional/technology area. * Omit the company administrator authorization. It allows not to request the document about the data protection regulation. Used in tdoc where this regulation does not apply. * Mandatory and blocked risks. It allows to establish different options in the risks. Take into account the type of task that affects by default (for general tasks -> all workers will be asked for ALL) (for tasks -> workers will be asked for the risks that are requested in the tasks they have associated) (requested activation from Dev).
These mandatory and blocked risks should not be confused with the mandatory risks defined in risks. The first refer to the way of requesting the documentation, which is based on the risks associated with the workers or by requesting EVERYTHING in advance. The second refer to the minimum documentation required for access to the center. * Internal notes of the functional area (change next screenshot). |
|
 |
See all functional areas.
Inactive functional/technological areas do not disappear but remain hidden, becoming visible from the view all icons. |
 |
Center – Add or update centers.
It allows making massive changes in the information and translation of the centers. It also allows massive creation of new centers.
To do this, from download you can extract the information in an excel, and from translations you can extract the translation. To update it, click on Import, and include the excel with the appropriate modifications. |
 |
Massive updates of Centers, Contacts and Trainings/designations.
Provides an excel with all the information related to the configuration of the functional/technology area, related to the centers, contacts or training/designations, in order to modify the report. |
 |
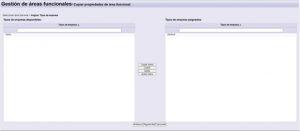
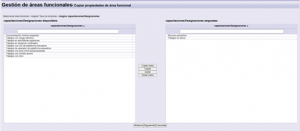
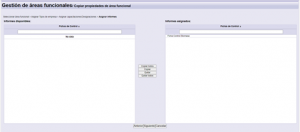
Copy functional area/technology properties.
The functional area / technology from which you start is the destination. Select functional area/source technology.
Assign company types.
Assign trainings.
Assign reports.
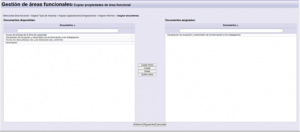
Assign documents.
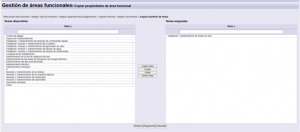
Assign task templates.
Assign requirement type orders, and may also include the order of requirements in the functional/technology area.
|
 |
Allows you to download the configuration of the functional/technology area.
Provides an excel with all the information related to the configuration of the functional/technology area. |
1. Select a specific technology
1.1. Data of Functional Area / Technology
It shows the general information of the functional area, including some configurable aspects:

| Allows you to modify the parameters of a functional area/technology. | |
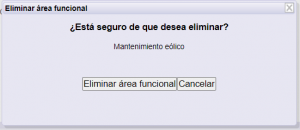
| Allows you to delete a functional area.
|
|
| Allows to translate the name of the functional area/technology into different languages. | |
| Allows you to download the configuration of the functional area/technology.
Provides an excel with all the information related to the configuration of the functional/technology area. |
|
| *Allows you to create a template for migrating tasks between different functional areas.
1.Click on add. 2.Choose the destination functional area.
3.Download the template.
4. Fill in the template. It consists of several tabs.
In the company types, trainings and types of requirement tabs appear the data of the functional area of origin. Also the empty fields be to completed with the data that you want to transfer to the destination when using the task migration tutorial. The data tab shows the data of the destination functional area. This tab, once the data has been filled in, they appear in green those that have been configured. 5. Import.
6.Confirm it has been created the template.
They might be created as many templates as it is needed.
Allows you to delete it at any time. |
|
 |
It allows to update massively the company types and trainings of the functional areas.
The template consists of several tabs where the current information for each option is identified. If you want to modify something, you just have to modify the data.
Fields in grey are not updated even if they are changed. |
1.2. Centers
This tab shows the list of work centers that belong to the same functional area / technology. They all share the same configuration.


|
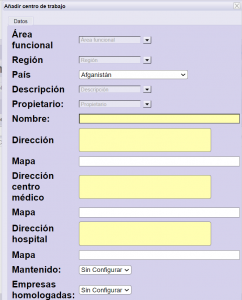
Allows you to create the parameters of a functional area/ technology:
–Basic information: functional areas, region, country, description, name, country, owner… –*Address and map of the center, the medical center and the hospital. –*Mantained: The options are: Yes/No/Other. Information regarding the usual maintenance tasks in the center. –*Approved companies: The options are: Yes/No. Information regarding whether the center requires approved companies or not.
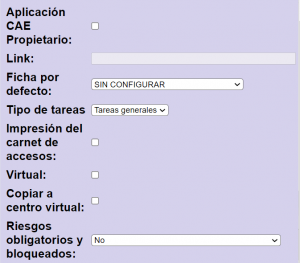
-Cae application owner and link: allows you to include this center information. –Report by default: the report’s format to use by default, if there are multiple control report configurations defined. –Type of tasks: Tasks / general tasks (centers). –*Printing the access card. Allows to enable/disable workers/vehicles for card printing. –*Virtual. Work center with different behaviour. Allows you to create a subcontracting chain, based on the existing of other centers. –*Copy virtual center. It must be marked in those centers whose subcontracting chain it is wanted to be included to a virtual center. –*Internal notes: allows you to include internal notes of the work center. –Mandatory and locked risk:
|
|
 |
Allows you to delete a functional area. |
 |
Allows access to all the information about the work center (equivalent to double clicking). |
 |
Allows you to see the work centers.
Inactive centers do not disappear but remain hidden, becoming visible from the view all icons. |
 |
It allows making massive changes in the information and translation of the centers. It also allows massive creation of new centers.
To do this, from downloads you can extract the information in an excel. To update it, click on Import, and include the excel file with the appropriate modifications. |
 |
It allows to extract in an excel all the information available from the work centers. |
1.2.1 Select a specific center
1.2.1.1 Work center data
Selecting a work center it is displayed the work center information window. At the top of the window the work center data are shown.
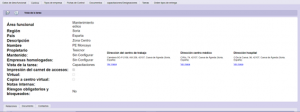
| Allows you to modify of the work center data. | |
 |
It allows to include the translation in other languages. |
Allows you to define the viewing mode of the tasks by default:
|
|
 |
After editing a task, it allows:
-*To be able to select columns, as long as you have multiple applicable relationships in that center. If you mark it with the check, you allow the administrators, when generating the report, to include or not the requirements that this relationship consists of. Only possible when working by general tasks. The requirements that you can select must be related. |
1.2.1.2 Relationships
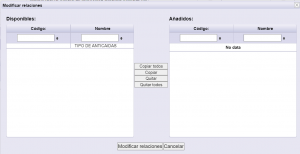
At the bottom they are shown all existing relationships. From this window you must configure which types of requirement of these relationships will apply in the selected work center.

If no type of requirement is selected, the relationship will act as its default value has been configured.
 |
Allows you to save the changes made. |
1.2.1.3 Document
List of all the documents included in this section.

 |
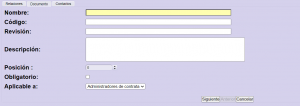
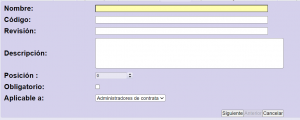
Allows you to include documents in the selected center. Document data.
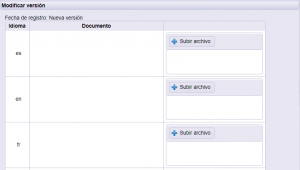
Document upload, being able to include in several languages at the same time:
Resume:
|
 |
It allows:
|
 |
Allows you to delete a document. |
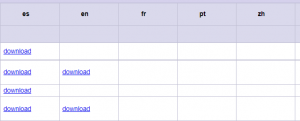 |
Allows you to download the file in different languages. |
1.3. Type of company
The types of company in the functional area/technology are managed from this tab.
The types of company are types of coordination, which allows you to request different documentation depending on the type of company that has the task.

 |
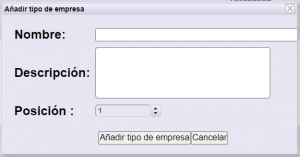
Allows you to add a new type of company.
|
 |
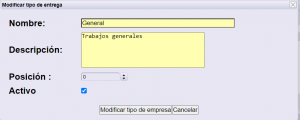
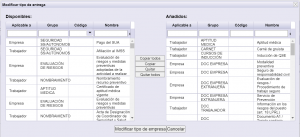
Allows you to modify the type of company by selecting it.
|
 |
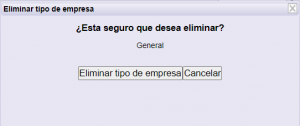
It allows to delete the type of company selected.
|
 |
It allows to translate to other languages.
|
 |
It allows to see all the types of company (active and inactive). |
| Allows you to generate the file of documentary requirements of the type of company selected. | |
| Allows you to generate the risk definition file for the type of company selected. |
1.3.1 Select a type of company
Selecting a company type it is shown the configuration screen of the type of company. This screen is made up of three tabs:

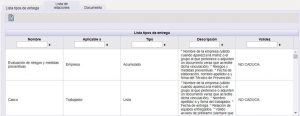
1.3.1.1 List of requirement types
Contains the list of requirements applicable to this type of company.
 |
Allows you to modify the configuration, including or excluding the requirements that apply to the type of company selected.
|
1.3.1.2 Relations list
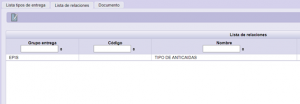
Contains the list of relations that apply to the type of company. The calculation of the requirement to be required from a relation will be carried out according to the configuration of said relation in the work center.
 |
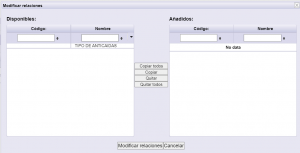
Allows you to modify the configuration, including or excluding the relations that apply to the selected company type.
Configuring a relation in a center does not imply that all the related requirements will be required, however it allows, to define for each center, which related requirement will apply in that center.
Must be taken into account that if there are included relations in the type of company, it must also be included in the training that affects it. |
1.3.1.3 Document
Allows you to view the documents included in this center.

1.4. Reports
From the reports tab, it is configured the reports from a technology. It allows to have several, although some of them must be the ones that apply by default.

 |
Allows you to create a new report. |
 |
Allows you to see all the report, active or inactive. |
 |
Allows you to create a new report using another already configured.
Select the one you want to duplicate and press the button. |
 |
Allows to delete/inactivate report.
Select,
|
 |
It allows you to print a sample of the report, in the different languages in which the requirement are translated. |
1.4.1 Create a new report
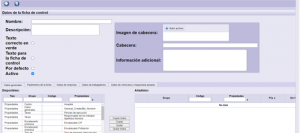
Pressing the add report button will display a pop-up window to write down the information regarding the new report.
It also allows you to configure the order in which the requirements will appear on the report, also taking into account grouping by groups. It is set by numbers from the row column.
 |
Allows you to save the changes made. |
 |
It allows to go back, without saving the changes made. |
There are several points to configure:
1-Report data. It allows to set the general configuration of the report.

General information:
- Name and description.
- Header image: allows to include the client’s logo.
- Header: text that will appear in report’s header.
- Additional information: information that will appear in report’s footer.
- Correct texts in green: allows to color in green the requirement that are correct.
- Text when it is about to expire blue: allows to color in blue, the requirements about to expire (according to your own configuration)
- Text for the report: allows to appear in the report a text previously defined in the requirement.
- By default: the established report that will apply by default.
2-General data. Allows you to set the general information displayed by the report.

All options given are property type, so it is set general information only.
3-File parameters. Allows you to set parameters that allow you to complete the information displayed on the report.

To create it, write the text, and indicate the order it will follow and press add.
4-Company data. It allows establishing the general information and the requirements that you want to show in the report at the company level.
![]()
The options given are:
- Properties: general information to show about the company.
- Requirements: the requirements configured in the technology that you want to show

It allows the following options:
 |
Just incorrects. This option can be used only for requirements applicable to company and accumulated. Allows you to choose what you want to be shown: *Everyone. It shows the status of all accumulated requirements. *Incorrect. It shows only the accumulated requirements that are incorrect. |
5-Worker data. It allows to establish the general information and the requirements that you want to show in the report for workers.

The options given are:
- Properties: general information to show about the company.
- Requirements: the requirements that are configured in the technology that you want to show.
 |
Without format. There are several ways to paint the requirements on the reports:
*Normal: correct /expired, missing or incorrect /pending of validation *Without format: There is no distinction in colors, all black *By risk: -When the requirement is only at mandatory risks, it applies without format. -When the requirement is in other non-mandatory risks, it applies normal (correct / expired, missing or incorrect / pending of validation). |
 |
Relation basing on. Option only valid in relationships. It helps us to define which requirement of the related is the basis of the relation (For example, in the preventive resource relation, the training is the basis). |
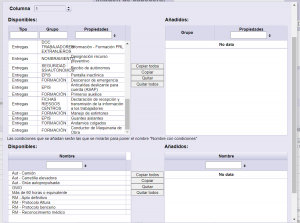
| Configure column. It helps us to group requirments in a column, thus reducing the view of the report.
1-Create the merge column. Only applicable to workers. Allows you to include requirements, relations and conditions. The requirement label will appear on the report.
In the configuration itself, a new line appears to configure the requirements that you want to join. 2-Configure Column.
It also allows configuring the control of the conditions if any of the requirements has it. 3-Delete column. Simply remove it from the added column. 4- Translation 5-Others. It is not necessary to write down anything in Group. The column appears by default, to be able to identify it, but this information does not appear in the report itself. |
|
 |
Allows you to translate into different languages. |
6-Data on heavy machinery, cranes and platforms. It allows to establish the general information and the requirements that you want to show in the report for vehicles.

The options given are:
- Properties: general information to show about the company.
- Requirements: the requirements that are configured in the technology that you want to show.
 |
Without format. There are several ways to paint the requirements on the reports:
*Normal: correct /expired, missing or incorrect /pending of validation *Without format: There is no distinction in colors, all black *By risk: -When the requirement is only at mandatory risks, it applies without format. -When the requirement is in other non-mandatory risks, it applies normal (correct / expired, missing or incorrect / pending of validation). |
 |
Relation basing on. Option only valid in relationships. It helps us to define which requirement of the related is the basis of the relation (For example, in the preventive resource relation, the training is the basis). |
1.5. Documents
Allows you to view the list of all the documents included within this functional area/technology. It also allows to include new ones. And it only allows you to modify the files that the user himself has created.

 |
It allows to include new documents
1-Document data.
2-Document upload. Might be included in other languages.
3-Resume.
|
 |
It allows to delete the document. |
 |
It allows to edit the document. |
 |
Only visible when the document is edited. Allows you to create a new version of the document, even in several languages if necessary:
|
 |
Allows you to translate the name and description of the document, depending on what you have previously selected. They appear the languages that are configured in each case.
|
1.6. Risks/Trainings/Designations
From the risks tab, the risks that will apply to that functional area/technology are defined.

 |
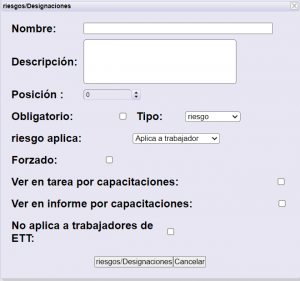
It allows to add trainings/designations.
–Mandatory: By marking the mandatory check, this risk will be mandatory for all workers associated to that technology or any of its work centers. There can be only one mandatory risk per functional area/technology. –Type: Training (equal to a risk) Designations (equal to a risk but in each task) -Training: Apllies to workers. Does not apply to worker. It allows you to create risks in which it only applies requirements to companies or vehicles. Therefore this risk cannot be included to any worker, and therefore this risk will never appear in red in the tasks, since there are no workers that can be include. -Forced. By marking the forced check, the risk will be forced for all the workers registered in the tasks in which this risk / training is included. Even if a worker does not have this risk associated, they will appear the requirements configured for that risk. Multiple risks can be marked as flagged. –See in task for training. Marking the check, the tasks of this center or technology will be seen by training and not by requirements. –See in report by training. Marking the check, in the tasks it will be seen the report by trainings (not only in the tasks). –Does not apply to ETT workers. It prevents to include this training/risk to workers marked as ETT. |
 |
Allows you to modify the risk/training settings. |
 |
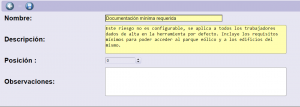
Allows you to modify data/information of the risk/training (does not affect settings).
Tasks are not recalculated.
In the observations section, you can write the texts that later appear in the observations of Risks definition. |
 |
Allows you to delete a risk/training.
|
 |
Allows to translate into other languages.
|
 |
Allows you to see all risks / training, active and inactive. |
1.6.1. Risk Configuration
When a risk is created or modified, all the information related to that risk appears at the bottom, divided into the following tabs:
![]()
1.6.1.1. Type of requirement’s list
Requirements list that apply to this risk/training:

 |
Allows you to modify the requirements that apply to the risk/training.
|
1.6.1.2. List of relations
List of relations that apply to this risk/training:

 |
Allows you to modify the relations that apply to risk/training.
Keep in mind that if relations are included in a risk/training, it must be included also in the type(s) of company in which they are affected. |
1.6.1.3. Conditions
List of conditions that apply to this risk/training.

 |
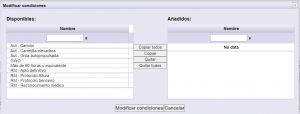
It allows to modify the conditions that will be required in the risk / training in which they apply.
The condition is always unique to a requirement, so this requirement must also include the type of company. |
1.6.1.4. Document associated to a risk
Document that applies for a risk/training. It is only possible to include one for each risk.
 |
Allows you to include and modify documents for a risk/training:
Press save to finish. |
 |
Allows you to modify the document. |
  |
Allows to delete document. |
1.7. Tasks
Shows the list of predetermined tasks defined, if any.
 |
Allows you to create a new predetermined task, based on the name and the defined trainings/designations.
1-Tasks data.
2-Trainings applicables.
3-Designations applicables.
|
 |
Allows you to delete a predetermined task. Select the task to delete before pressing delete.
|
 |
It allows to export to an excel the list of predetermined tasks. |
1.8. Type of requirement order
Allows you to set the order of deliveries that appears in the application. There are differences between company documentation, workers and vehicles, separated into different tabs.
 |
Allows you to modify the order of requirements. It is set by numbers from the order column:
|
 |
Allows you to save the changes made. |








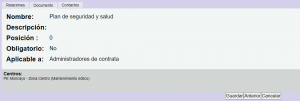
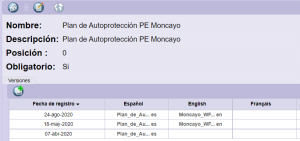
 Modify the documents of the center.








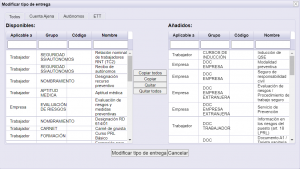
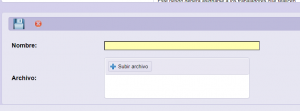


 Press to save changes.
 Press to cancel changes.

