Company Tutorial
It is a guided process, in which the application asks you for the necessary data, to register a new company, register in new centers…
*Depending on the customer, some of the steps described below are not shown.
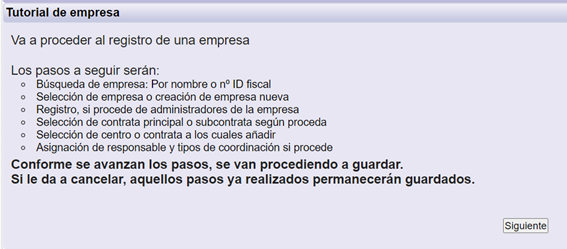
1. Company’s search
Search for the company based on its name and/or VAT.

Click on ‘search’ to continue.
2. Company’s selection or company’s creation
They appear two options that satisfy that search. Pay attention because if a company is added as a new one and the company was already created, the company will be duplicated.
a. If the company is found in the search result, it is selected and automatically goes to the point ‘Selection of work centers’. Optionally, it is possible to enter the contractor administrator data (name, surnames and e-mail) in case it is necessary to include a new one. If not, click on ‘Omit’.

b. If the company is not found in the search result, click on ‘Add new company’ and go to the point ‘Company data’.

It requires to fill in the company’s full data.

Click on ‘Next’ to continue.
3. Creation of contractor administrator if applies
If the company has an administrator, clicking on ‘Omit’ it skips this step. It is also possible to create more than one administrator at the same time by clicking on ‘Save and Create a new one’. If the company is added as a new one, it must be necessary to include an administrator, who uploads the required documentation.

In both options, it allows you to create more than one administrator at the same time clicking on ‘Save and Add another’. Click on ‘Save’ to continue.
4. Selection of main contractor or subcontractor
It appears the option to mark as a main contractor or as a subcontractor of another.

Click on ‘Next’ to continue.
In case of choosing subcontractor, you have an additional screen, where you can select the company that is going to subcontract them.

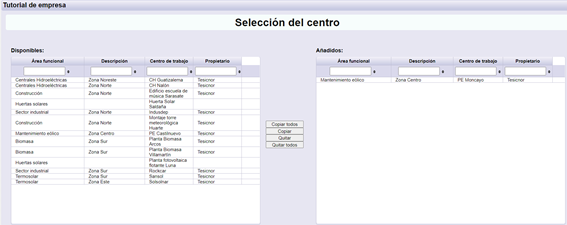
5. Selection of the work centers to add
It appears the list of centers to which you have access to be able to include in added in which centers you want to create the subcontractor.
You must mark the work center in the ‘Available’ column (a whole row changes to grey), press on copy and it will go to the ‘Added’ column.
You can only select centers of the same technology and you have to repeat the process for each technology you want to register.
If the company was already created, those work centers already assigned to the company will appear selected and marked in blue in the added column.
6. *Selection of type of company
*Depending on the client, the types of company may be different, depending on the configuration that has been established in each case.
The types of company correspond to types of coordination and different documentation can be required.

Click on ‘Next’ to continue.
7. Summary
It appears a summary with the information contained in the request.

Click on ‘Save’ to finish.
8. *Add new task
In those technologies that work by task, this step is included in order to complete the necessary data to create the tasks.
![]()
Click on ‘No’ to not create a new task. In this case, the company will be created in the subcontracting tree of the indicated center and according to the type (main contract/subcontractor) selected in the previous steps.
Click on ‘Yes’ to create a new task. Allows you to define all aspects of the task including the configuration of workers and vehicles.
8.1. New task data
Requests the necessary data to create the task. It is completed with the data provided through the tutorial but allows to modify them in case any rectification is necessary.
- Name of the task
- Start date
- End date
- Register as a document manager for the task. Allows you to be registered as the person responsible for the task, defining how often you want to receive the task report.
- You can select one of the available tasks. Allows you to define trainings/designations based on templates. They must be previously defined to be able to select them.

Click on ‘Next’ to continue.
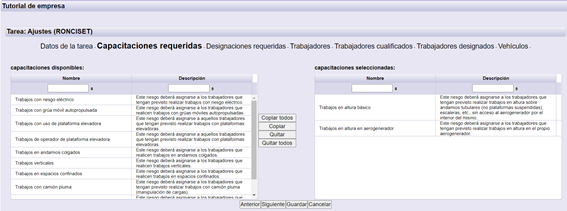
8.2. Risks/Capabilities
In the left column, ‘Available’, they appear the risks/capabilities that can be included.
In the right column, ‘Added’, the risks/capabilities that apply to this task must be included.
Using the option ‘Copy’, ‘Copy all’, ‘Remove’ and ‘Remove all’, the different risks/capabilities can be moved between the columns, depending on the need.
Click on ‘Next’ to continue.
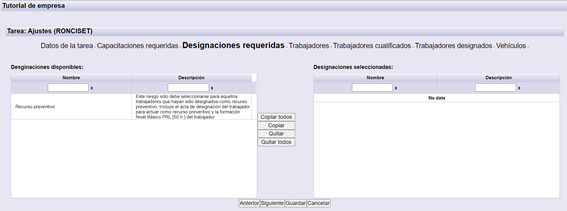
8.3. *Designations
This section will appear or not depending on the configuration available to the client, whether or not designations have been defined.
In the ‘Available’ column on the left, the designations that can be included are listed.
In the right column ‘Added’, the designations that apply to this task should be included.
Using the ‘Copy’, ‘Copy all’, ‘Remove’ and ‘Remove all’ options, you can move several designations between the columns, as needed.
Click on ‘Next’ to continue.
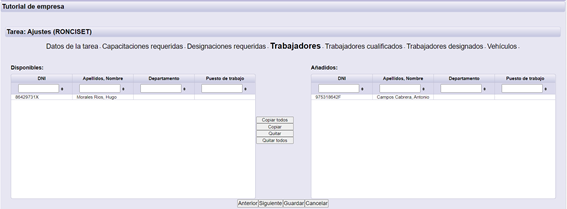
8.4. Workers
In the left column, ‘Available’, they appear the active workers of the company.
In the right column, ‘Added’, the workers who are going to attend this task must be included.
Using the option ‘Copy’, ‘Copy all’, ‘Remove’ or ‘Remove all’, the different workers can be moved between the columns, depending on the need.
Click on ‘Next’ to continue.
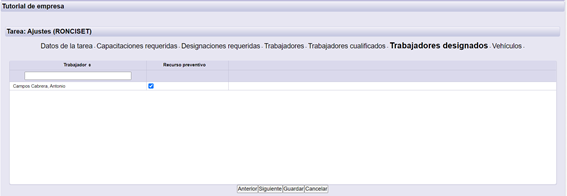
8.5. Qualified workers
It appears the list of workers and the trainings included in this task, allowing you to train any worker.
Click on ‘Next’ to continue.
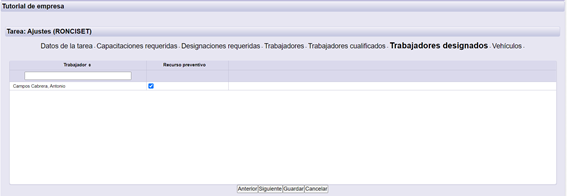
8.6. Designated workers
It appears the list of workers and designations included in this task, allowing you to designate one worker.
Click on ‘Next’ to continue.
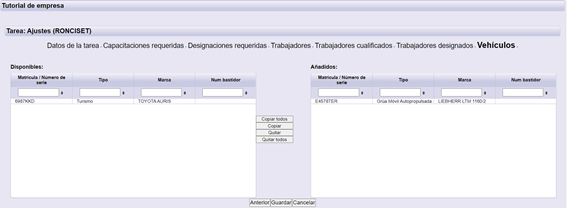
8.7. Vehicles
In the left column, ‘Available’, they appear the active vehicles of the company.
In the right column, ‘Added’, the vehicles that are going to attend this task must be included.
Using the option ‘Copy’, ‘Copy all’, ‘Remove’ and ‘Remove all’, the different vehicles can be moved between the columns, depending on the need.
Click on ‘Save’ to continue.
8.8. Confirm data
Finally, it appears a summary with all the information provided to create the task. If this is correct, select ‘Save’ to finish it.

