Subcontracting requests
From the Subcontracting requests menu access to the registration requests.
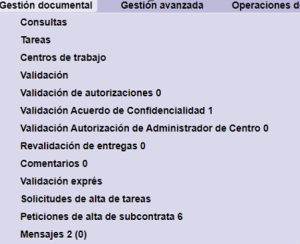
By default, the only subcontracting requests that appear on the main screen are those which are Unprocessed.
1. List of requests
The column status indicates the status of the request:
- Unprocessed: the company that is going to be subcontrated for this task has not been registered yet.
- Processed: the request has already been processed and the company that is going to be subcontractes has already been registered in the task.
- * Processed automatically : Allows requests to be processed automatically, as long as as the following circumstances are met:
- The company was previously created in tdoc to the subcontracting request.
- The company has at least one contractor, or it has been included from the subcontracting request.
- The functional area where the new task are going to be created, has only one kind of company-.
- Denied or Cancelled: the request has been denied or cancelled.
Initially, just Unprocessed requests are shown. From the icon ![]() (show all requests for the work center), the historic of all the requests made will be displayed.
(show all requests for the work center), the historic of all the requests made will be displayed.
| It allows you to cancel a subcontracting request while it is still unprocessed, you must previously select the request to cancel. | |
| Allows you to see all the requests made by the user. | |
| Generates a report in Excel format with the list of requests. |
Each time a request is made, the user receives an email with the number and data of the request made. Subsequently when they are processed, another mail is received with the confirmation. These emails are also received by the user who performs it, the contractor administrator, as well as those responsible that have been indicated.
2. Process subcontractor registration requests
This tutorial is prepared to process the of main contractors or subcontractors registration requests.
1.Select a request to process:

| Allows you to select the request to work with. |
2.Select company.
It allows you two options: search results and Add new company. This step is important, because if the company was already created and is created as a new one, the company will be duplicated.

2.1. Search results. The application has found similarities with the active or inactive companies that it has.
2.2. Add new company. Allows you to create as a new company.
Request the necessary information from the company to register it.
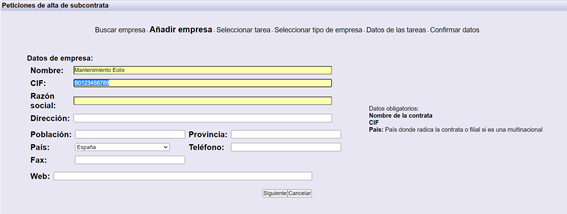
3. Add administrator.
Request the necessary data to register a contractor administrator, the person in charge of managing the company in this application. This section is only mandatory when the company does not have any administrator. If the company already has a manager, the ‘Omit’ option will be enabled, so as not to include any more administrator if you don’t want to. If you want to enter more than one administrator, click on ‘Save and Add another’.

Pulse ‘Siguiente’ para continuar.
4. Work center or tasks selection
In the column on the right, ‘added’, the centers/tasks that have been requested to be registered through this request appear. In the ‘Available’ column on the left, the centers/tasks that can be included appear, in case any rectification needs to be made. Using the option ‘Copy’ or ‘Copy all’, ‘Remove’ and ‘Remove all’, you can move the different centers/tasks between the columns, depending on the need.

It is possible to find in the column of additions, some centers in blue. This can appear when working for general tasks and the contractor you want to register is already registered in that center. Click ‘Next’ to continue.
5. Type or company
In this section we indicate the type of company (type of coordination assigned). It is completed with the data provided through the request itself, but it allows modification in case any rectification is necessary. The types of company correspond to types of coordination and can be requested different documentation.

*In the event that the technology in which you want to register has a single type of company, this request will be processed directly. Click ‘Next’ to continue.
6. *Task data
Requests the necessary data to create the task. It is completed with the data provided through the request itself, but it allows modification in case any rectification is necessary.
- Companys name
- Start date
- Ending date
- Type of company
Register as a document manager for the task. Allows you to register as the person responsible for the task, defining how often you want to receive the control sheet for this task.
You can select one of the available tasks. Allows you to define trainings/designations based on templates. They must be previously defined to be able to select them.

Click ‘Next’ to continue.
7. Risks/Trainings
It is completed with the data provided through the request itself, but it can be modified in case any rectification is necessary.
In the column on the right, ‘Added’, the risks/trainings that have been requested to be registered through this request appear. In the ‘Available’ column on the left, the risks/trainings that can be included appear, in case any rectification needs to be made.
Using the ‘Copy’ or ‘Copy all’, ‘Remove’ and ‘Remove all’ options, the different risks/trainings can be moved between the columns, depending on the need.
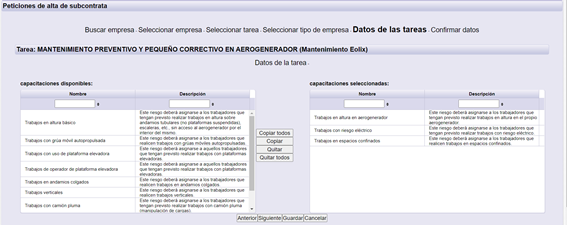
Click ‘Next’ to continue.
8. *Designations
This section will appear or not depending on the configuration available to the client, whether or not designations have been defined. It is completed with the data provided through the request itself, but it allows modification in case any rectification is necessary.
In the column on the right, ‘Added’, appear the designations that have been requested to be added through this request. In the ‘Available’ column on the left, the designations that can be included appear, in case any corrections need to be made.
Using the ‘Copy’ or ‘Copy all’, ‘Remove’ or ‘Remove all’ option, you can move the various designations between the columns, as needed.
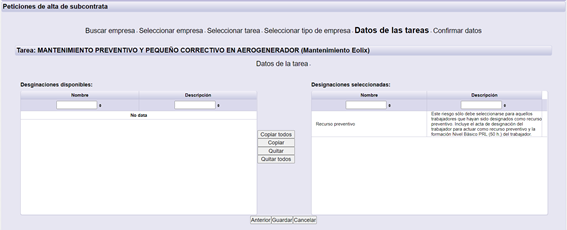
Click ‘Next’ to continue.
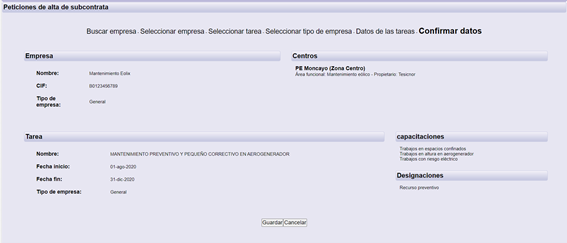
9. Confirm data.
Below is a summary with all the information provided for the creation of the request. If this is correct, select ‘Save’ to finish.
Once the request has been processed you will receive an e-mail. This e-mail will also be sent to the person who has indicated that he will manage the documentation of this company together with the access information to the application.
